Dual Booting - Linux and Windows
Sure, you're Linux Curious. But you're not ready to go all in, and you need to keep using Windows too. Dual Booting is your solution. Read on to learn how to make it happen.

I get it, you're not ready to give up Windows, but you're "Linux Curious." and running a VM isn't going to satisfy that itch.
Dual booting between Windows and Linux is probably your best option until you're ready to "rip the bandage" off and just switch completely. 😁 OK, maybe I'm projecting a bit there, but whether it is your gateway to a fully Linux experience or just your option for doing things outside of Copilot's view, a dual boot setup can be valuable. So this post is going to talk you through taking your existing Windows 11 system and configuring it for dual boot.
I really do recommend NOT dual-booting, there are complications with a dual-boot environment. I'd really recommend you simply install Linux as your only OS, but I understand that solution is a step too far for some, at least in the beginning.
Preparing For the Install
Because we don't want you to be stuck in a bad situation, we want to be extra prepared. So let's start with hardware: You need two USB 3.x thumb drives with at least 8GB of capacity. These don't need to be brand new, but they will be completely overwritten, so they need to have nothing on them you need kept.
Why two? Well, we want installation media for both Windows and Linux. Here's where to get them:
- Windows: Choose the "Media Creation Tool" download for Microsoft Windows 11. The webpage is a bit unclear about which download to use, so read carefully.
- Linux: We're going to use the latest version of Linux Mint for this example. I recommend the Cinnamon Edition. As of the time of this writing that version is 22.3, codenamed Zena.
Creating Windows Install Media - in Windows
After downloading the Media Creation tool, connect your first USB drive (find a way to label it as your Windows Install Media - a sharpie or a sticker or something) and run the Media Creation Tool. The tool is reasonably easy to follow, here are the key settings/options to be aware of:
- Make sure the "Use the recommended options for this PC box is checked on the "Select Language and Edition" page.
- Choose "USB Flash Drive" as the target for the download, otherwise you're going to have to figure out how to transfer from an ISO image to the USB drive yourself
Dell has a nice video on this process if you need more help.
Creating Linux Install Media - in Windows
We described this well in our "installing Linux for the first time" post, but we'll c&p here to make life easier:
This step starts with choosing your desired Linux version. But for the sake of this process, we're going to choose the latest version of Linux Mint with the Cinnamon desktop, which you can download from here:
This link goes to the latest Linux Mint download page. Choose the "Cinnamon Edition" to download.
Choose one of the download methods on that page to download the latest .iso file, likely to be named something like "linuxmint-21.3-cinnamon-64bit.iso," to wherever you download files on your computer.
Next, we need to download a utility to burn this ISO image onto your flash drive as an executable, bootable image. Doing this manually in Windows is not straightforward - you can't just copy the .iso file to the thumb drive - so we'll use a utility for this. For the sake of this post, we'll use this one called Etcher:


The ISO "burner" app we'll use for this process, available for Windows, MacOS, and Linux
Install Etcher by double-clicking the downloaded installer and installing like you would any other executable. Once installed, plug in your USB thumb drive to become the install media and run the app and you should see an interface like this:
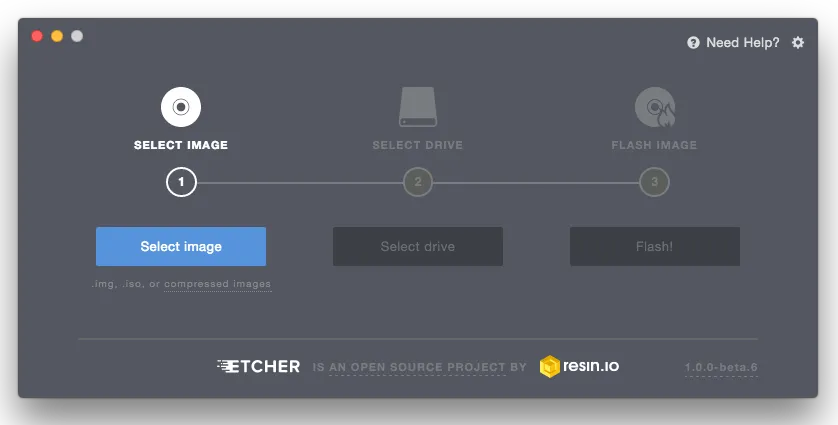
Choose the .iso image once you hit the "Select image" button, and follow up by choosing your newly inserted USB drive after hitting the "Select drive" button, and execute the process with the "Flash!" button. The process of writing to your media will likely take up to a couple of minutes, trust the process. Once completed, close out Etcher.
Preconfiguring Windows For Less Drive Space
Sadly, your hard drive doesn't have infinite space for infinite storage, and your Windows install would have been configured by default to use the whole drive, meaning there's no actual room for the Linux install. So we'll have to shrink the Windows install to make room. The good news is that you probably have unused space that has been allocated to Windows, and that means all we have to do is reallocate the space. However, by default whole disk encryption is probably turned on in your Windows environment as well. If we try to reallocate space with WDE turned on we're going to corrupt your Windows install and that's a mandatory reinstall, which we're trying to avoid. So let's prep Windows to turn off whole disk encryption, at least for now.
- Open the settings app, and navigate to the "Privacy and Security" section.
- Choose the "Device Encryption" option from the list of privacy and security settings.
- Toggle Device Encryption to off, and confirm that change when prompted.
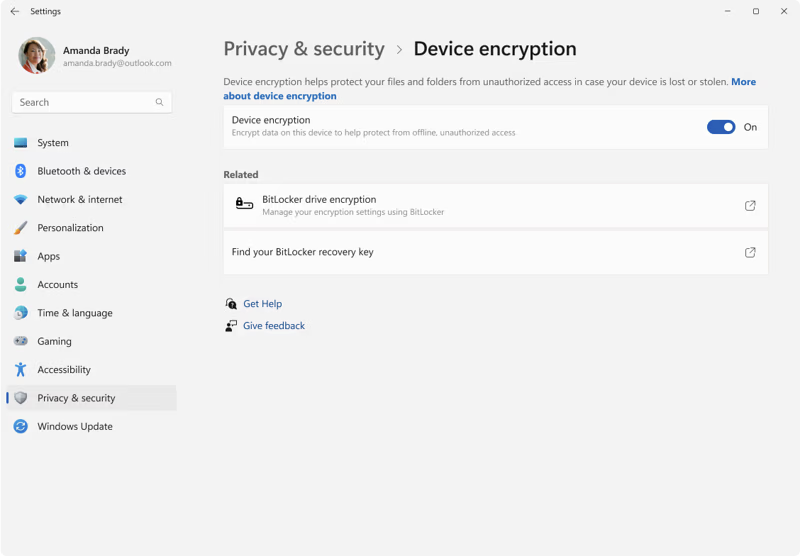
Decrypting the drive will take some time (assuming it was encrypted) and it is important you do not proceed further until that's done. You can still use your Windows install while it is decrypting, but you can't yet install Linux until it finishes.
BIOS Settings
There are two major changes we need to make in BIOS before we start the installation process. One is mandatory, the other is recommended.
- Mandatory change: turn off "fast boot" or "quick boot." If left enabled this option has a bad habit of screwing with wifi and bluetooth drivers, making the hardware unavailable to your Linux environment even though it works just fine in Windows.
- Recommended change: turn off secure boot. I know, I just told you to disable a security feature. But before I go on a long winded rant let me just say that it is complicated, and older computers that don't get BIOS updates anymore are especially troublesome. If you choose to keep it on that is your call, but complications may ensue.
This brings us to the question: How do you enter the BIOS in the first place? There are two ways:
BIOS Entry - Key-press
When you boot your computer from a cold start you have the opportunity to press a key to enter BIOS before your computer boots into the operating system. Unfortunately the key varies between manufacturers, and even between models sometimes. To enter the BIOS this way I strongly recommend using your favorite search engine (AI or not) to find out the appropriate key to get you into the BIOS.
BIOS Entry - From a Windows Menu
Fortunately, Windows has a menu-driven way to enter the BIOS regardless of make and model of computer. Here's the process:
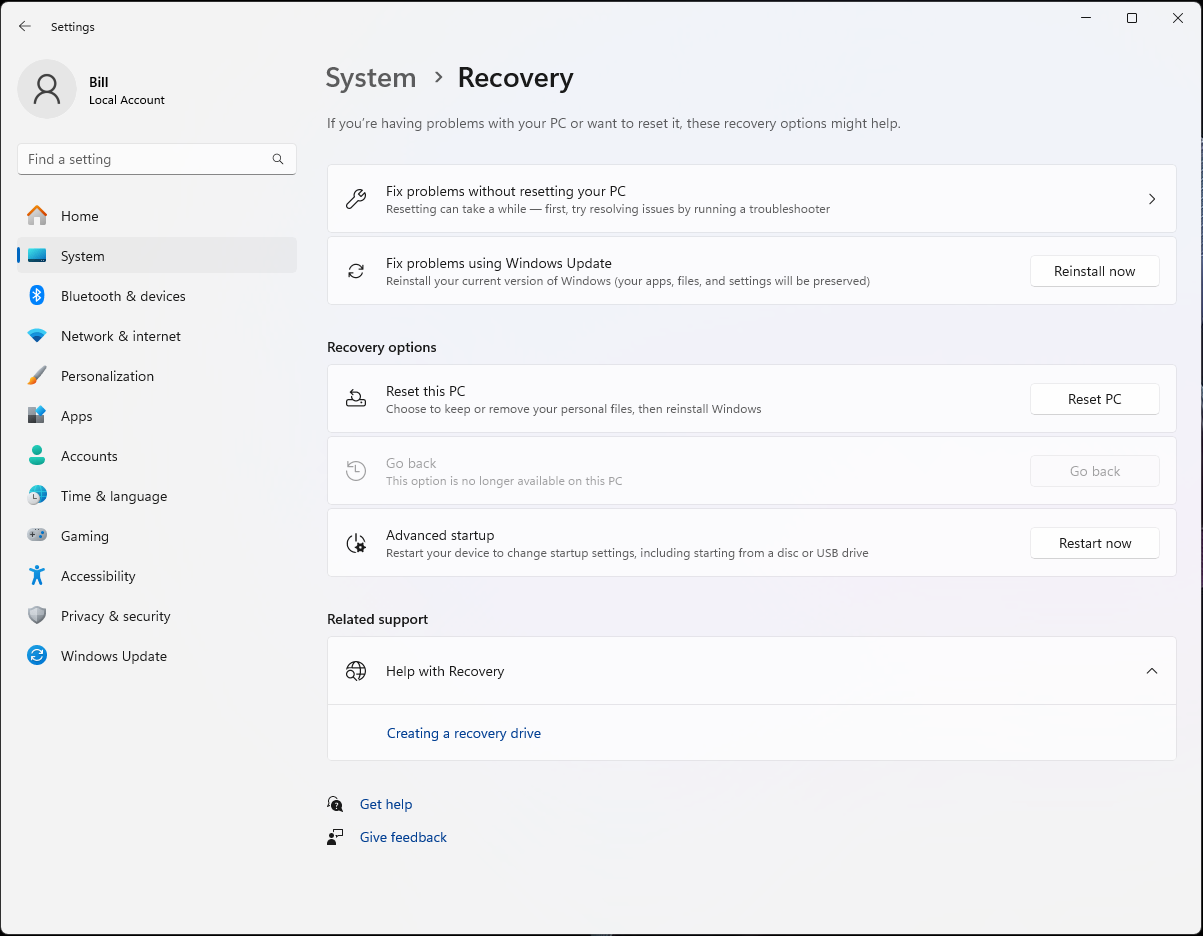
- In the "Settings" App search for "Advanced startup" which should bring you to the System/Recovery window. Hit the "Restart now" button where Advanced startup is on the right side.
- On reboot you'll see a blue screen with a few options on it. Choose "Troubleshooting" on the first screen, "Advanced Options" on the second, and "UFEI Firmware Settings on the 3rd. Then, hit the reboot prompt.
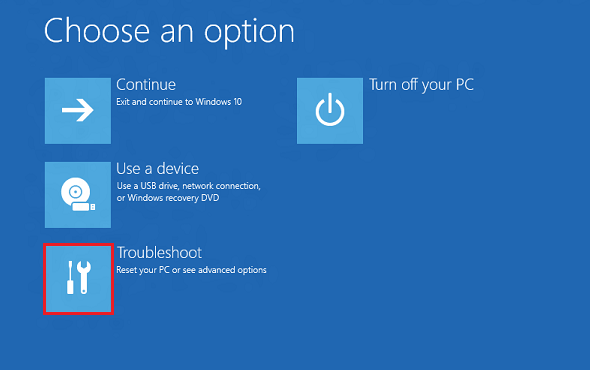
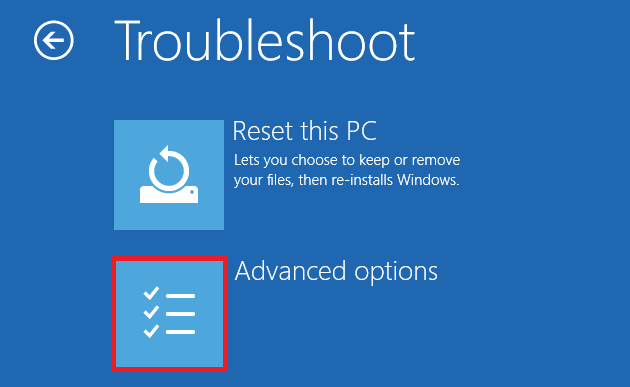
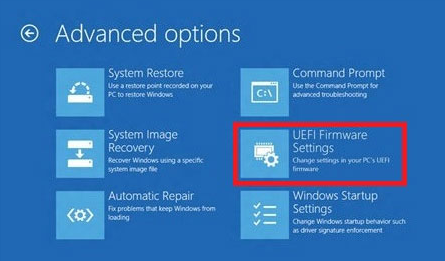
Stepping through the blue screen
It turns out that knowing how to get into the BIOS will be very important in future steps along the way as well, so be ready to refer back to this section.
Fully Charge Your Battery
Yes, this is probably overkill, but since we're probably talking about a laptop you might as well belt-and-suspenders this by having both a full battery and a connected power supply before embarking on the install process.
Booting Into the Linux "Live-CD" Environment
(Yes, I know, you're using a USB drive, but "Live-CD" is still the term often used, kind of like "dialing a phone"- when's the last time you saw an actual rotary dial phone?)
- Make sure you've inserted the Linux Install Media in a USB 3.x port on your computer. As a general rule, all the USB C ports are 3.x compatible, and any USB A port with a blue piece of plastic in the port is as well. Otherwise look for a USB "Super Speed" symbol by the port, Generally abbreviated with two S-es.
- Boot into BIOS using one of the methods previously described.
- Navigate the BIOS until you find a way to adjust the boot order to ensure that the computer boots from the USB drive before it boots from the internal hard drive. Unfortunately this varies by computer brand and model, so you may need to do a search for your particular settings.
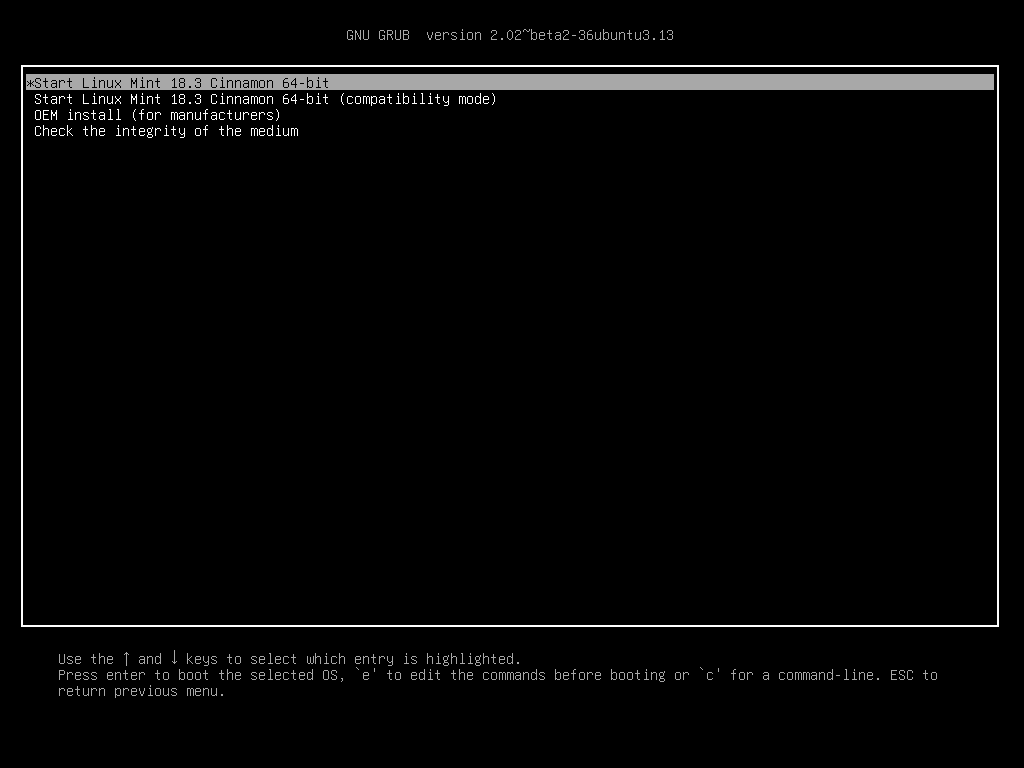
- Once you boot you'll see a text-based menu of boot options. Choose the first one and hit Enter. After a few moments the Linux Live-CD desktop will pop up.
Shrinking the Windows Partition
The Linux Live-CD desktop will look like this:
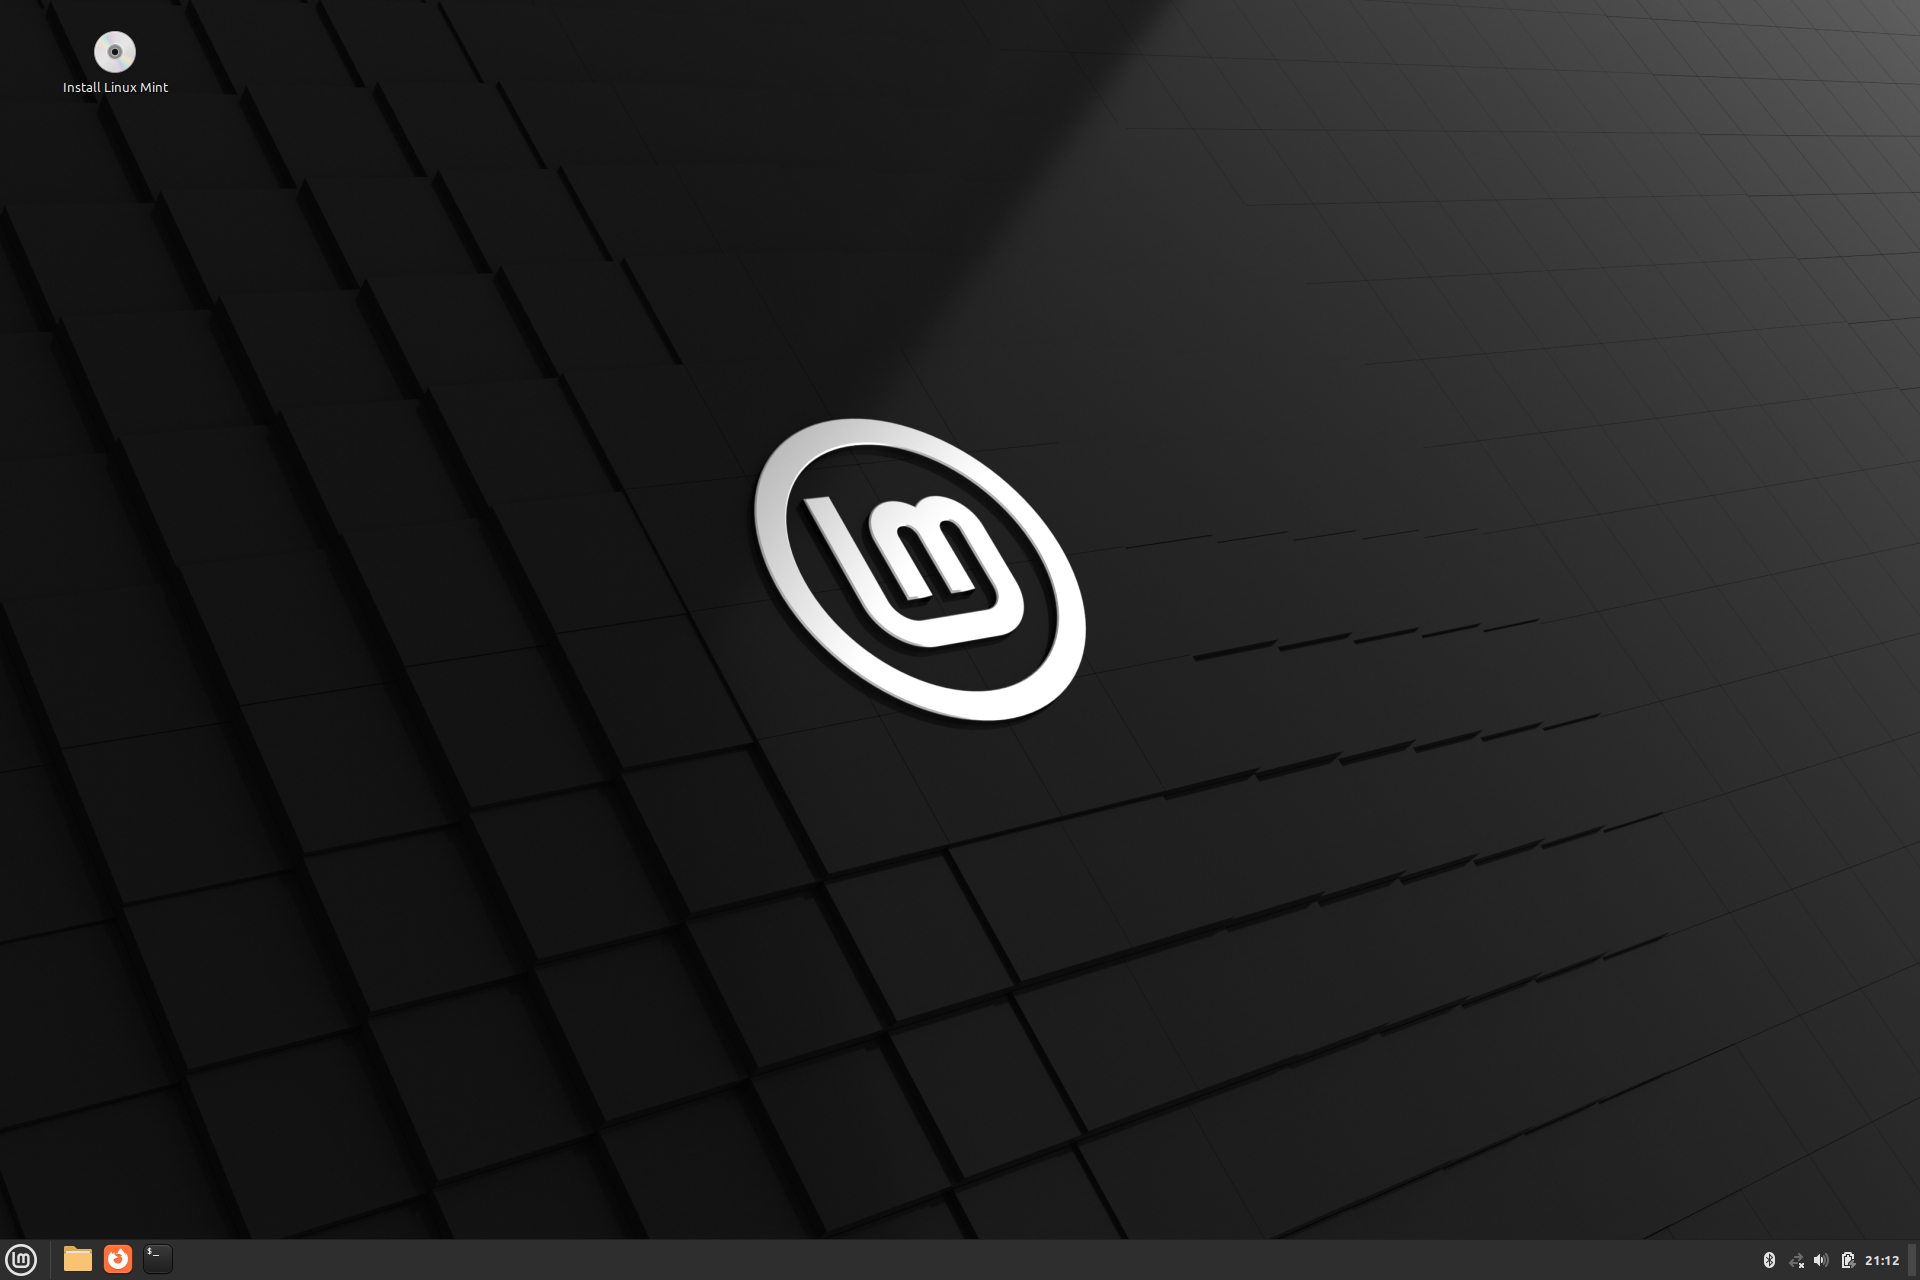
Before we start installing Linux Mint we need to make space for it by shrinking your Windows environment's storage space.
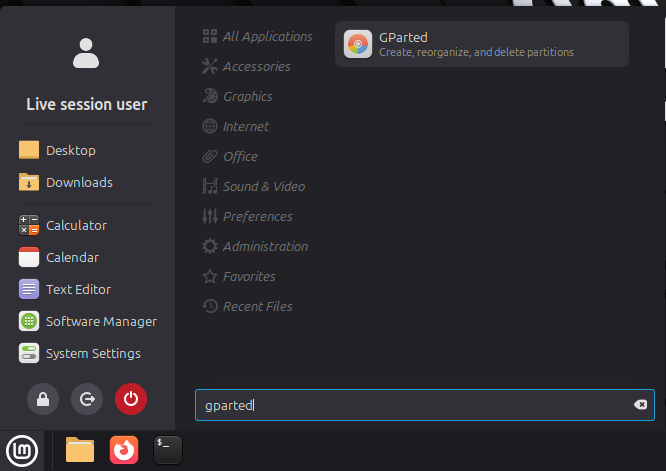
- Open the start menu (the circle with "LM" in it in the lower left) and start typing "gparted" in the search box. Click on the app that shows up
- The "GNOME Partition Editor" will open and will show you a graphical representation of your hard drive's partitions and used space. It will look something like this:
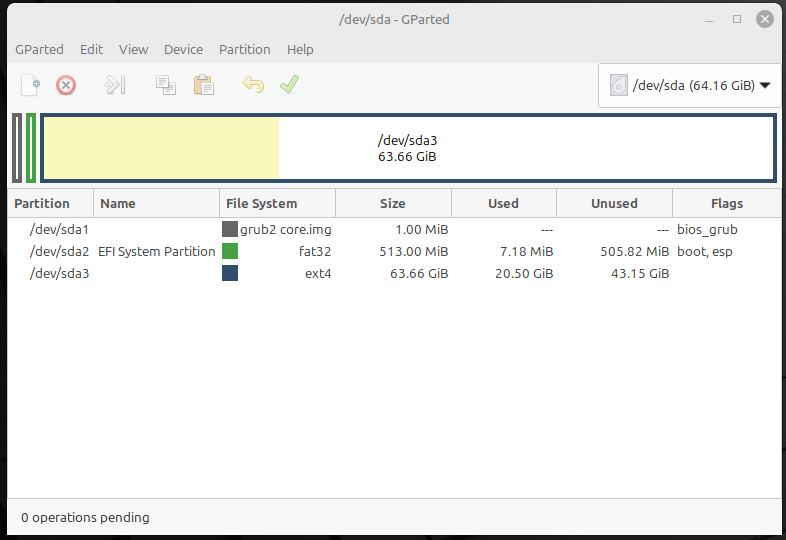
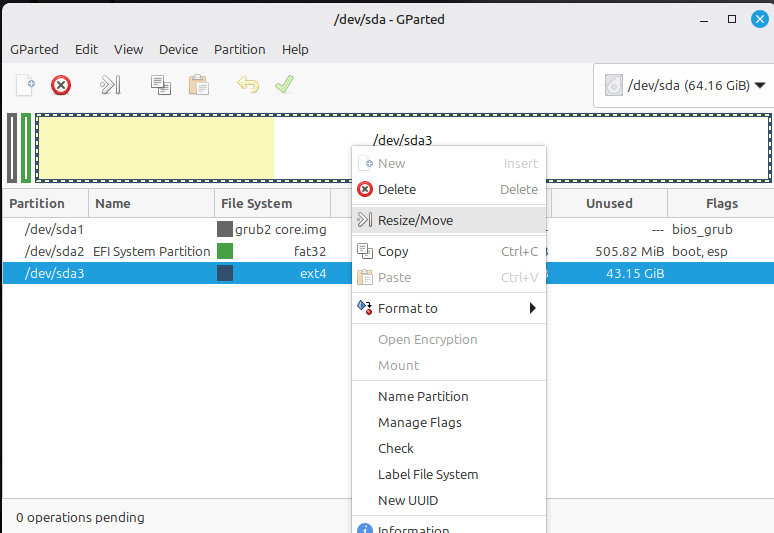
- The largest partition visible is typically your Windows install. The shaded part of the partition represents the space currently used, and the unshaded section is the free space in the partition. Right click on that partition and choose "Resize/Move" from the menu.
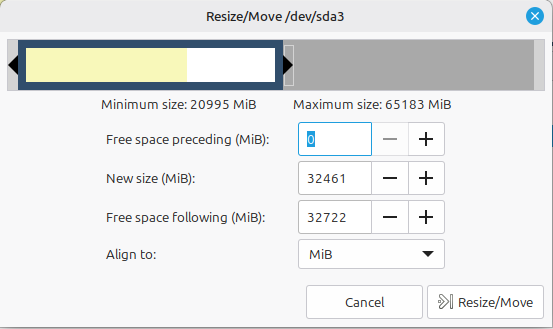
- You need to decide how big to make your Linux partition. Here are a few guidelines to help:
- Leave at least 10% free space available for your Windows environment when you resize it. So if the "used" amount on the partition is 60GB, leave another 6 GB available.
- Allow a minimum of 64GB for your Linux install.
- If you believe you're really going to do most of your computing in Linux going forward, make that partition as big as you dare.
- Otherwise, a 50/50 split is a good generalization.
Once you've decided, resize your partition and hit the "Resize/Move" button.
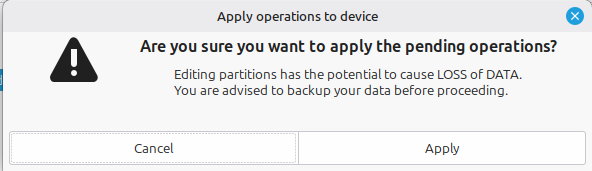
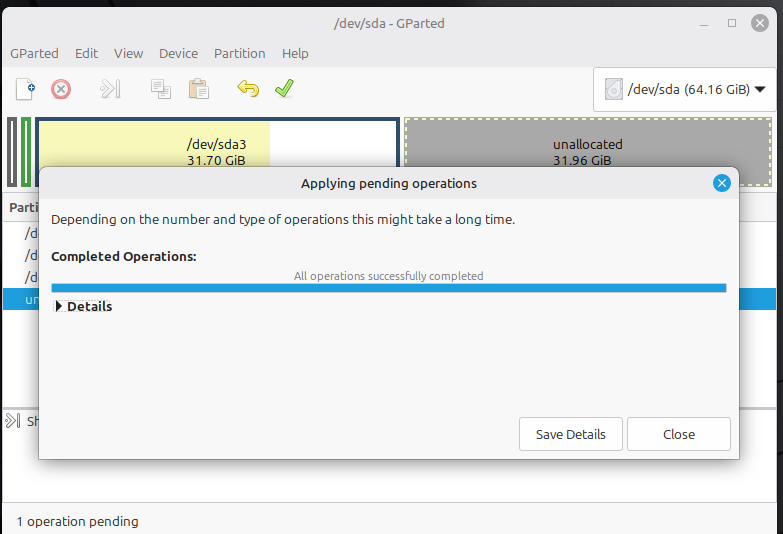
- You'll now see that there's an "unallocated" space shown in the graphic and in the list of partitions on your drive. This is perfect, our Linux install will take advantage of this free space. However, before it can do that we have to execute the change we just made. Hit the green ✔️ button on the toolbar at the top to execute the change. You'll be asked to confirm the change:
- The status window will open and will remain open while the edits are being made. Eventually the window will indicate the resizing is complete. This may take many minutes depending on the size of your partition, speed of your computer, etc. Once it does indicate completion you can close the GParted windows.
Proceed With the Linux Installation
Start the installation by double-clicking on the "CD" icon in the upper right that is labeled "Install Linux Mint." You'll be prompted with the first of many screens that need your input.
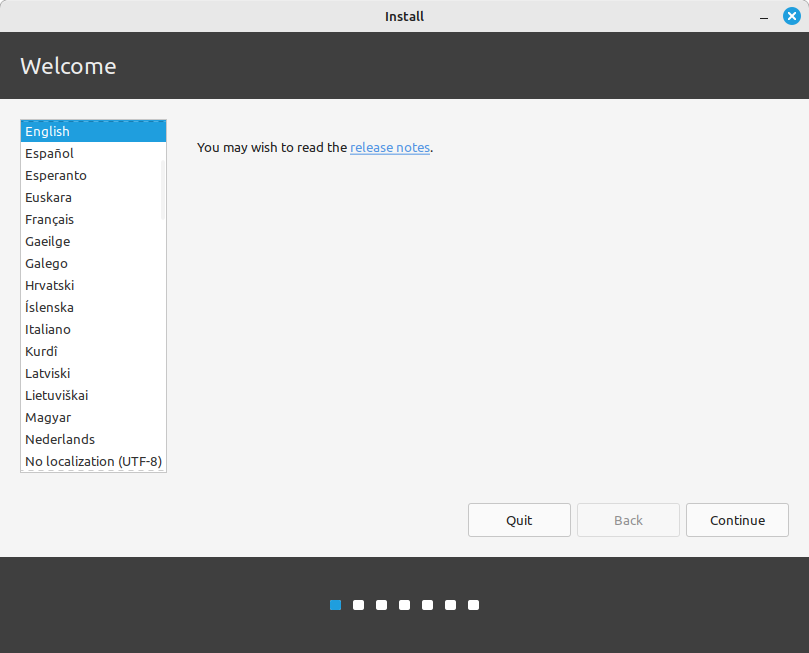
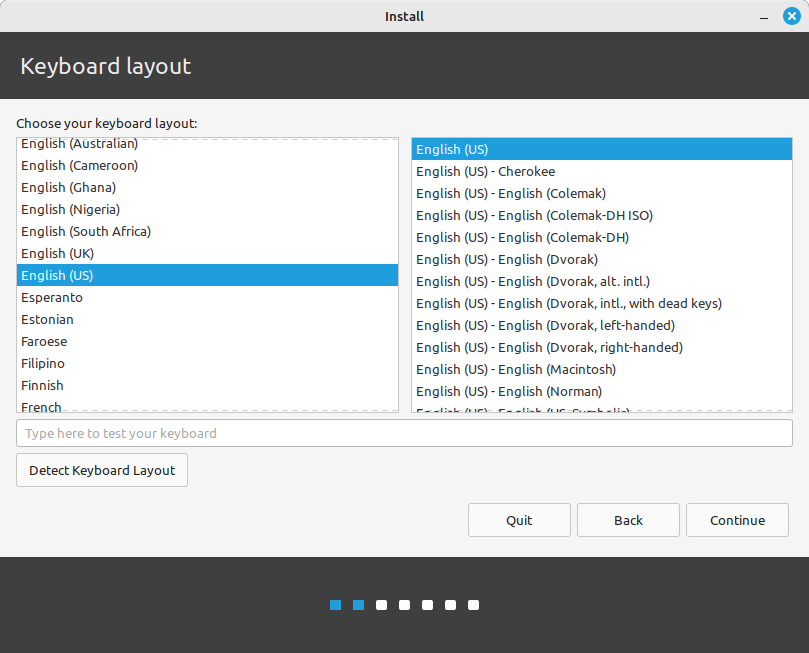

The first two screens were easy, the third one may need some input. This screen asks you if you want multi-media codecs installed. As a person who wants to watch video and listen to audio from services and such on Linux, you will need to check this box. However, that brings us to the question of "secure boot." If you haven't disabled secure boot in BIOS you're going to be prompted for a validation password that will be necessary next time you boot the computer. So make sure, if shown, that check-box is checked as well. Then, create a one-time-use password that you'll type in twice to verify you typed it correctly (and write it down, if you goof it up you get to do this whole install all over again). You will only use this password once, so use your own judgement on how strong it is. Once you've created a password, continue. It may take a few moments to process this for you, do not be alarmed.

This is where we're getting to the nitty gritty. For this installation, choose the "Install Linux Mint alongside Windows." (I know, the screenshot says alongside Linux Mint - this is my VM we're taking screenshots from, so please just play along) Then hit continue. The Linux partition will be built to use all the available unallocated space by default.
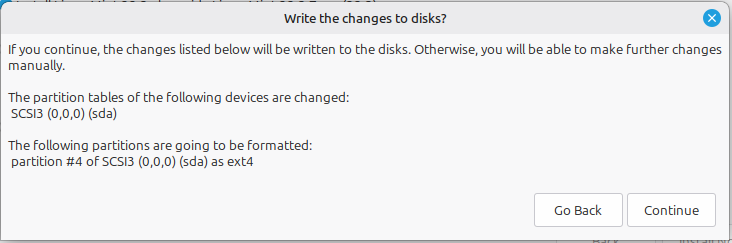
This warning will pop up as soon as you hit continue on that previous screen. The list of partitions may be different, but hitting continue here really gets things moving. Then we get to screen five and six.
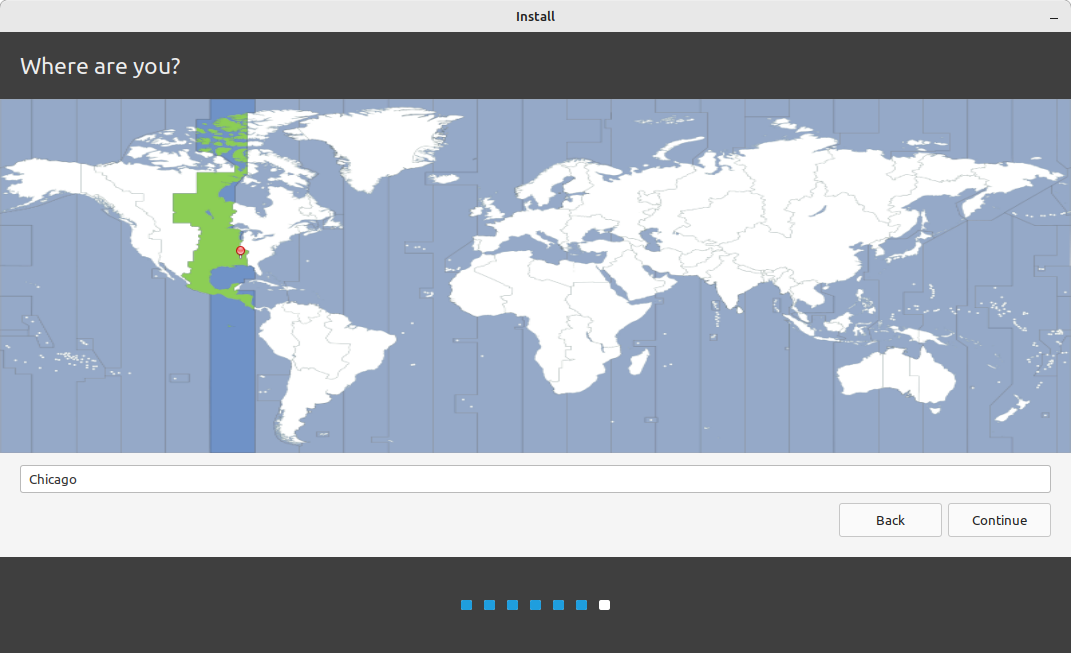
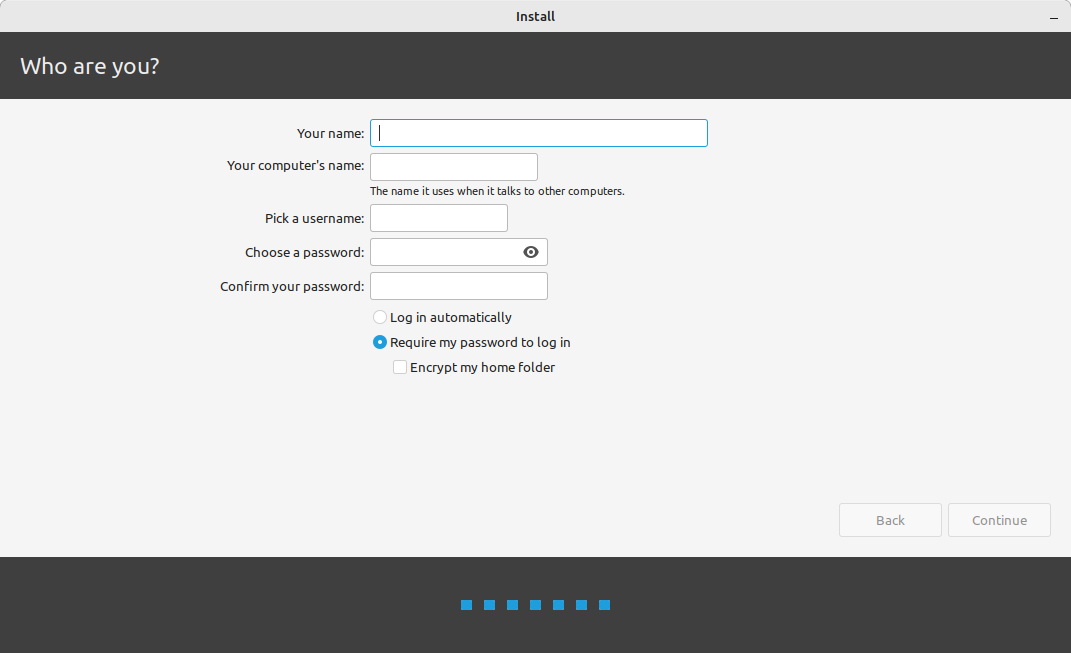
This is the last input you need to provide, here on screen 6. You can do as you like for all the other entries, but I recommend that you do NOT choose "log in automatically." That's just poor cybersecurity. Choosing to encrypt the home folders is a good balance between personal privacy and security along with performance - encrypting the whole disk can degrade performance, and your personal files will live in your home directory anyway. Hit continue, and you'll have the joy of watching Linux Mint install on your computer.
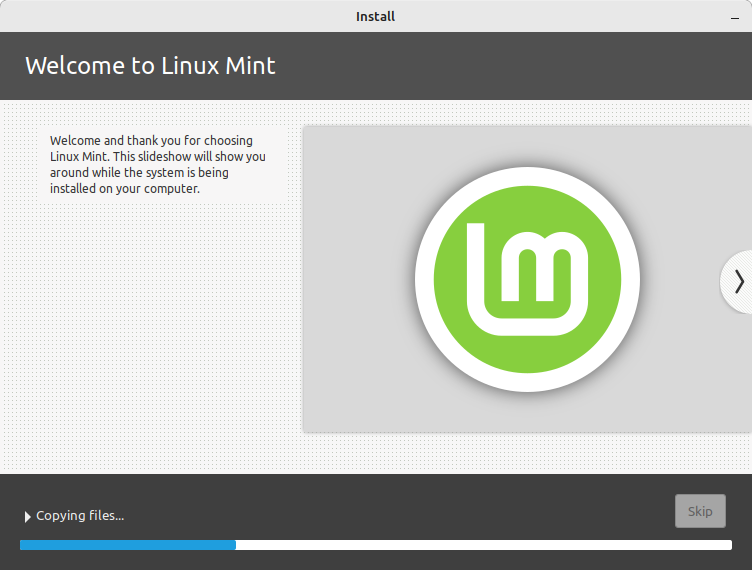
Once the installation is done, you'll see the following message.
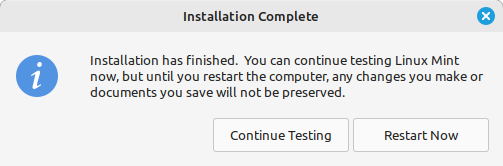
Clicking "Restart Now" will start the reboot process, which will then ask you to remove your installation media (the thumb drive) and hit "Enter" to finish rebooting.
The New Boot Menu
From now on when you boot your computer you're going to see a GRUB menu. That menu will be how you tell the computer whether you want to boot into Linux, Windows, or the BIOS (woohoo! An easy way into the BIOS!!!), but will time out and default to boot into Linux after a few seconds. Here are the menu choices you're likely to see:
- Linux Mint - this is the default and will take you to your Linux Mint environment.
- Advanced Options for Linux Mint - this is an alternate "safe mode" option for Linux Mint that will help with driver problems and such.
- Microsoft Windows - here's the choice for booting into Windows. Remember, there's still a chance we corrupted your Windows install, you will want to verify you can boot into Windows and don't need to reinstall everything from scratch.
- UEFI Firmware Settings - This is the easy way into the BIOS.
Congratulations, You've Installed Linux For the First Time!
For the sake of length, I've written up another post about things to do the first time you log into your new Linux environment.